Patio Construction Requires Skilled Professionals

A patio provides a location for parties and relaxation. Whether it is hot summer or cold winter, it offers an outdoor location free from bugs and mosquitoes.

Patio

When building a patio with paver stones or bricks set in concrete or with other dry-laid materials, builders follow similar marking, excavation, tamping and leveling processes. Visit https://www.cleanstoneconstruction.com/ to learn more.

A patio is a great way to extend your living space into the yard and take advantage of views that may be limited by existing trees, bushes or landscape elements. However, before the patio can be built, the ground must be excavated and framed to prepare it for concrete installation. This is a critical step in any hardscaping project and requires skilled professionals to complete it safely and correctly.

Before digging, a professional will map out the location of the patio using a line level. They will then use a piece of graph paper or an online floor planning tool to create a to-scale plan of the site. Once they have finalized the design, the area is marked off and excavation begins. The excavation process will likely involve digging down to a depth of 7 inches — 3 inches for the gravel base and 4 inches for the concrete.

After the excavation is completed, a layer of loose gravel is placed on top of the soil. This is followed by a layer of sand. This provides a base for the pavers and helps to reduce shifting of the surface as it ages. A layer of mulch can also be added to the sand for aesthetic purposes.

A wood frame is constructed on the excavated site, either using 2 x 4 pressure-treated ground-contact lumber or a more flexible bender board that can be manipulated to accommodate curves in the patio design. Before the concrete is poured, the frame is soaked down with water to prevent the mix from drying out too quickly. Then, a portable cement mixer is loaded with the concrete mixture and mixed for the amount required to fill one grid unit of the patio (4 inches thick). The concrete is poured into the frame and tamped with a hand tamper or power tamper.

Sub-Base

In order to properly support a paving slab or surface, it is important that there is a layer of sub-base underneath. Whether this is for a patio or driveway, the sub-base ensures that the load of the paving is spread evenly. This will help to prevent settlement and ensure that the paving performs well.

This can be done in a number of ways, depending on the type of material used. For a patio, we usually recommend an aggregate sub-base such as crushed stone certified and guaranteed as MOT Type 1. This is a strong, stable and durable material that also drains very well, helping to prevent water pooling beneath the paving which can cause damage and make surfaces slippery.

It is recommended that any material used for a sub-base is compacted as thoroughly as possible using a machine such as a vibratory roller. This will need to be done both longitudinally and transversely, where possible, until the material is ‘tight’.

Before starting construction, it is a good idea to make a to-scale plan of the patio to ensure that it is the correct size and layout. This can be done with graph paper or an online floor planning tool and will help to eliminate any surprises once the construction begins. It is also important to consider the direction that any water runoff should go, as this will help to prevent any flooding issues later on.

Once the ‘tight’ sub-base has been completed, it is time to start construction of the patio itself. It is often best to build this as a grid of 3-foot-square units, which can be either square or rectangular. These are framed with 2 x 4’s and nailed together using 8-penny galvanized common nails.

Forms

Patios can be made from a wide variety of materials, and new trends are leaning toward incorporating patio amenities that can make the area comfortable for dining, relaxing or entertaining. For example, a built-in fire pit can provide warmth and atmosphere, while a water feature can bring tranquility. Some people choose to add a pergola for shade or an outdoor kitchen to facilitate cooking and eating outdoors.

Most standard concrete patios are built using forms to hold the concrete in place, and there are several different types of forms available for this purpose. Some types include on-site wood slab forms, manufactured metal framing for walls and foundations and newer, energy-efficient insulated concrete forms.

Before the forms are put into place, they must be anchored to the ground. This is done by staking the corners of the square with 2×4 lumber and driving 3d nails through the lumber at each stake point to ensure that the concrete form will not shift. It is also a good idea to place 1x kickers at each joint and 4-foot intervals around the outside of the forms for additional support, since concrete is very heavy.

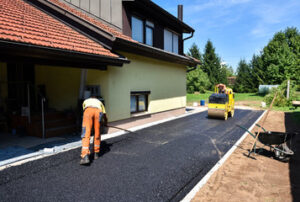
A patio can be constructed from a number of different materials, including bricks and paving stones. A paver patio is usually constructed from a grid of 3-foot-square concrete units that are framed by 2×4 lumber. For this type of patio, a gravel base is often used, particularly in areas that experience poor drainage or freezing temperatures. The builder will work in sections, pushing the concrete into the forms and removing excess concrete with a hand trowel. He may brush the surface of the concrete with a bristle broom or trowel to produce a textured finish.

Concrete

A beautiful concrete patio can make all the difference in a backyard living space. It’s a great place to entertain friends and family, relax and unwind, or simply enjoy the outdoors with your favorite book or glass of wine. However, patio construction is a specialized type of concrete work that requires proper planning and execution to achieve the best results.

A concrete patio can add significant value to a property, as well as increase its overall curb appeal. Many homeowners choose to use concrete for their outdoor spaces because it’s durable, visually appealing, and versatile. Concrete can be molded and shaped to create a unique design, and it can also be stained or colored with pigments to produce a variety of colors and hues.

Unlike wood and composite wood, concrete is highly resistant to rotting or warping. Additionally, it can withstand heavy foot traffic and heavy patio furniture without cracking or sinking. It also doesn’t need yearly staining or refinishing, which can save homeowners time and money.

Concrete is also environmentally friendly. It can be produced from recycled materials, and it’s durable enough to last for decades. This reduces the need for frequent replacements, which contributes to lower energy consumption and fewer greenhouse gas emissions.

Whether you’re looking to transform your existing yard or create a brand new patio, concrete is a good option. KC contractors say concrete patios have a longer lifespan and require less upkeep than decks, so it’s an excellent choice for homeowners who want to spend more time enjoying their outdoor space rather than worrying about maintenance. Concrete can also be used to build other features, including raised garden beds and retaining walls.

Pavers

Pavers are paving stones that come in different shapes, sizes, and colors to fit your patio design. They can be crafted from materials like natural stone, bricks, and concrete to offer durability and enhance aesthetic appeal without requiring extensive upkeep.

They are commonly installed over a gravel base that’s been spread out and tamped down to compact the soil. A board is often laid across the area to help determine that it’s level. A geotextile cloth is sometimes placed over the tamped down soil to limit weed growth. A layer of sand is then added, typically a coarse sand that’s been screened to remove fine debris. It may also be a polymeric sand that’s coated with an agent that helps to bond the sand and prevent it from shifting in the future.

Builders often use stakes and string to outline the area of the patio in advance. This method allows the builders to see what shape and size the patio should be and how it will lay out with the rest of your garden landscape. Alternatively, builders can use a type of eco-friendly spray paint to mark the shape and size of the patio ahead of time.

Once the builders have marked the area, they’ll start laying out the pavers. They’ll usually start with the largest stones first to provide a strong foundation. They’ll then work their way down to the smaller stones. Once all of the paving stones are in place, sand or a fixing material is poured on top and then brushed into the joints between each paving stone. It’s then watered in to lock-in the stones and create a sturdy surface that can be used immediately.

What Does a General Contractor Do?

GCs oversee all aspects of construction projects and are responsible for the day-to-day operations of the project. They ensure that needed materials arrive on site and that each phase of a home project is completed correctly, efficiently and on schedule.

Getting started in this industry requires the right education and field experience. Obtaining licensure varies by location and can take several months to a year or more. For more information, Click Here to proceed.

In project planning, a general contractor works with his team to determine what needs to be done and how it will be accomplished. This includes establishing who will be responsible for specific aspects of the project, such as a construction manager or an assistant general manager. It also involves determining what tools are needed to accomplish the project and how they will be managed. Developing a detailed work breakdown structure is important in project planning, as it allows all involved parties to see the scope of each task and who will be doing what.

Project planning is essential to ensuring a project can be completed on time and within budget. Often, this is achieved by identifying key project milestones and creating a schedule that can be used to track progress. It is also crucial to determine what steps must be taken to avoid unforeseen costs or delays and how these can be mitigated. This may involve establishing a contingency plan or working with the design team to identify potential risks.

A general contractor is familiar with all aspects of a construction project, including its structural, electrical, mechanical, and finishing plans. They must have a strong understanding of how each part fits together to ensure the building is safe, durable, and meets all required specifications.

During the project planning process, a general contractor will often create a charter document that defines the objectives, stakeholders, and scope of the project. This document can be referred to as the “gospel” of the project and is critical to its success.

The general contractor is also responsible for obtaining a permit to begin construction and coordinating with the owner, architect, and engineer during the engineering design phase. Once the engineering design is complete, the project manager will prepare a contract for the construction of the building. This is usually accomplished through a competitive bidding or negotiation process.

While the general contractor is in charge of project planning, they must rely on the expertise and experience of the superintendents, specialty contractors and subcontractors to actually perform the work. In many cases, this work is performed by unionized craftsmen and laborers who are governed by collective bargaining agreements. Therefore, the general contractor must be able to negotiate with the various tradespeople and craft laborers on the jobsite and encourage cooperation and collaboration.

Contract Negotiation

Construction contracts are complex legal documents with many different clauses. It is the job of a General Contractor to negotiate fair and equitable agreement terms that benefit all parties involved in the project. Contract negotiation often involves the use of dispute resolution processes such as arbitration, mediation and litigation.

General contractors also play a critical role in project budgeting, working with architects and clients to develop and approve design plans that are both cost effective and meet building codes and specifications. They will then manage the project to completion, sourcing materials and equipment; hiring subcontractors; overseeing their work; obtaining the necessary permits; and ensuring all project costs are monitored closely.

When it comes to bidding, most GCs are familiar with the concept of “winning the bid” by offering the lowest price they can while still covering their costs and turning a profit. While this approach may seem like it leaves little room for negotiations, it’s important to remember that the old saying “you get what you pay for” applies just as much to construction projects.

The key to successful contract negotiation is understanding what each party needs from the project. For example, project owners want quality construction that meets their budget and schedule. General contractors want fair agreements with their clients and subcontractors that provide a safe environment in which to work, meet payment terms, and define the scope of work.

Negotiation techniques vary by person, but some general principles to consider include: understanding that each person’s perspective is legitimate; learning how to listen actively; focusing on what matters most to you; and avoiding confrontation. It’s also important to remember that the other person is a human being, and their emotions will play into the negotiation process as well.

Additionally, negotiating with contractors should always be done in good faith, with an open mind and a desire to find solutions that benefit all parties. Lastly, it’s important to carefully review insurance policies, especially those of subcontractors, as they frequently don’t adequately cover all risks and have limited limits of liability. The ability to identify these potential issues before a dispute arises can save both parties time and money.

Subcontractor Management

One of the key functions of GCs is managing subcontractors, and it is an ongoing process that extends well beyond project completion. GCs must select the right subcontractors, ensure that contractual agreements are adhered to, communicate effectively with them, and ensure the quality of work is up to standard.

This can be a complex task, especially in large projects where the GC oversees multiple teams of subcontractors. GCs must coordinate with each team to provide accurate information, schedules, and timelines, and also ensure that the work being performed is consistent with the architectural design and blueprints. Additionally, a GC is responsible for coordinating and providing utilities on the construction site, maintaining safety in the workplace, and performing engineering functions.

When selecting subcontractors, a GC considers the specialized skills and expertise they offer, as well as their track record on similar projects. They also consider how they fit into the overall project plan and budget, as well as any legal compliance issues. For example, in most jurisdictions it is necessary for workers to have a valid work permit, and the GC must ensure all workers are properly documented before they can start working on the jobsite.

GCs must ensure that contractual agreements are adhered to by both the GC and the subcontractor. This is often done through written contracts that include detailed delivery expectations, scope of work, and payment terms. GCs also communicate clearly with subcontractors throughout the project to ensure all parties are on the same page and to resolve any conflicts quickly. This is facilitated through regular meetings, daily jobsite huddles, and other forms of communication between the GC and subcontractors.

Effective subcontractor management is crucial for a successful project. GCs can leverage their experience and expertise to ensure that all aspects of the project are coordinated and executed correctly. This helps to minimize costs, increase speed, and ultimately deliver high-quality results. For example, a GC can identify the best way to get materials to the jobsite, help to avoid schedule delays due to weather or material shortages, and keep rework rates low by ensuring that all stakeholders are on the same page.

Site Management

As the name suggests, site management is the day-to-day work on the construction project. It requires the morale-boosting talents of HR managers and the planning smarts of general managers. Essentially, site managers do what is necessary to keep the building project on track and within budget.

Among these tasks are obtaining permits, providing temporary utilities on site, managing the removal and disposal of construction waste, and monitoring schedules and cash flow. They also communicate with the project owner, architect, and design team about construction challenges or changes to the scope of work.

Strategically selecting subcontractor partners is a major part of site management, as this has a significant impact on project outcomes. General contractors often compile a roster of pre-qualified specialty contractors to choose from, assessing their past performance, safety ratings, references, experience and financial stability. They also review each contractor’s proposed plans for executing the specialized scope of work to ensure that they are consistent with established best practices.

The success of the construction process relies on a united, skilled onsite crew. To this end, an effective site manager recognizes the value of a cohesive team and invests time upfront aligning them around common goals, values, and expectations. They also foster open communication, cooperation, and transparency in decision-making, as well as promoting a safe and healthy workplace.

Finally, an effective site manager is constantly looking for ways to improve productivity. They use their understanding of prevailing building methodologies to maximize production and minimize costly delays. They also develop strategies for improving the efficiency of equipment and processes, reducing downtime and the impact on the overall timeline.

If you have the grit and determination to become a successful construction site manager, you can progress into more senior roles such as contract management or project consultancy. You can also specialise in areas such as estimating, health and safety, or building inspection. Alternatively, you could apply to become chartered through an industry body such as the Chartered Institute of Building. This will enhance your prospects even further.

The Benefits of an Asphalt Driveway

Asphalt driveways can be extremely durable when they are properly maintained and sealed. Keeping a regular schedule of cleaning, removing snow, and not using de-icing salts will help to prevent damage and prolong the lifespan of your asphalt driveway.

Asphalt Driveway

Additionally, choosing the right type of asphalt for your driveway is essential. Choosing a professional contractor to install your asphalt will also make it last longer. Visit https://www.pavementsolutionstx.com/ to learn more.

Asphalt is a popular material for driveways, but the cost of installation can be high. The price depends on the location of your home, the size of your driveway, and whether it’s a new or replacement driveway. In addition to the cost of the materials, you’ll need to budget for labor costs. These can run between $5 and $7 per square foot for standard asphalt.

Asphalt usually contains recycled material, which helps keep the cost down compared to other materials. Hot mix asphalt is a common choice for residential driveways and costs between $1 and $3 per square foot. You can also choose porous asphalt, which uses a layer of crushed stone to minimize runoff and improve drainage. Porous asphalt typically costs $8 to $15 per square foot.

An asphalt driveway can be a great investment for your property. It adds curb appeal and increases the value of your home. In addition, it’s easy to repair and maintain. A properly maintained asphalt driveway can last up to 20 years or more. However, you should consider resurfacing your driveway every three to five years to prevent cracking and other problems.

If you’re installing a new asphalt driveway, the first step is to remove the existing one. This can be done with a jackhammer if you’re comfortable working with machinery. If you hire a contractor to do the work, ask about their experience with this type of project. This will help you avoid miscommunication and save money in the long run.

The next step is to prepare the site for laying down the asphalt. This includes removing any rocks or debris. A base layer is then put down, followed by the asphalt itself. The final step is to apply a sealant for protection. You can expect to spend between $2,880 and $4,030 for a two-car asphalt driveway.

It’s best to enlist the services of an experienced asphalt contractor when installing a new driveway. This will ensure that the process is completed correctly and in a timely manner. It’s also important to make sure the contractor has the proper machinery and equipment for the job. Do-it-yourself projects can be dangerous and time consuming, especially when dealing with heated asphalt.

Durability

Asphalt driveways can last as long as 30 years, if you take good care of them. That’s an incredibly long lifespan compared to concrete, which may crack under the stress of cold weather and water damage. Asphalt is a mix of crushed stones and sand that gets mixed and poured at high temperatures. This allows it to withstand the harsh winters of Minnesota and Wisconsin, as well as any precipitation that might come along.

The average asphalt driveway will develop some cracks as it ages, but these are usually minor and can be repaired easily. If you keep up with routine maintenance, such as resealing and patching, your asphalt driveway will last longer.

Regular sweeping and blowing can also help keep organic materials, such as leaves and pine needles, from building up on your asphalt. This can also prevent debris from settling on and damaging the surface, which will extend its lifespan. The color of asphalt is naturally dark, which helps to hide stains and dirt that can mar the appearance of concrete surfaces.

Another factor that impacts the longevity of an asphalt driveway is how much traffic it receives. While a three-inch layer of asphalt can support the weight of most sedans and trucks, heavy vehicles will prematurely deteriorate the surface where their wheels travel. If your driveway will see a lot of heavy vehicles, consider getting it laid at least five inches thick.

If you choose to use recycled asphalt, it can be every bit as durable as a hot mix asphalt driveway and can limit the amount of petroleum products in your local landfills. It is also cheaper to install and can be a great choice for those on a tight budget.

The most significant challenge to an asphalt driveway’s lifespan is the weather. Freeze-thaw cycles can cause serious damage to both concrete and asphalt, and they both lose strength if they are subjected to repeated ice and salt exposure. If you live in an area with extreme weather, it’s worth investing in a quality concrete driveway instead of an asphalt one.

Appearance

Asphalt driveways look sleek and stylish after they are installed. Their dark color and consistent texture help them stand out from their concrete counterparts, making them a more desirable choice for homeowners who want their driveways to add curb appeal to their homes. They are also less prone to staining from oil spills and other chemicals. Asphalt is also more flexible than concrete, which makes it easier to drive on and prevents cracking and settling over time.

When properly cared for, asphalt can last a long time. Its lifespan can be further extended by using innovative drainage solutions, which ensure that water does not pool in the driveway and erode the base materials underneath. However, if your pavement begins to crack and settle over time, it will need to be repaired with an asphalt patch. This repair will only be a temporary solution to the problem, and it is not as effective as a full-scale renovation.

Once the pavement is cracked, weeds and other forms of vegetation can thrive in the resulting holes and potholes. They may even start to grow in the cracks, further compromising the structural integrity of your driveway. This is why it is important to hire a reputable professional who uses high-quality paving materials and implements best practices for asphalt installation.

In addition to preventing weeds and other vegetation from growing, a quality asphalt installation will include a thorough base material preparation process. This involves the removal and modification of existing materials, such as gravel and sand, and compaction to create a strong, solid foundation. A proper base will increase the longevity of your asphalt and ensure that it can withstand freezing and thawing cycles.

As the asphalt ages, it will begin to lose its deep black appearance and become gray, flaky and stony in texture. This is due to the bitumen that holds the aggregates together drying out and eroding. This is known as oxidation, and it is a normal part of the aging process for any type of pavement. If your driveway is gray in color within the first twelve months after paving, there is a serious issue that needs to be addressed right away.

Maintenance

Asphalt is a durable material that will last for years if it’s properly maintained. Regular inspections, cleaning, crack filling and repair work can lengthen the lifespan of your driveway and keep it looking attractive.

The most important maintenance task is keeping the asphalt surface free from debris. This should be done regularly by sweeping or using a power hose spray to remove dirt, tree leaves and other items that can scratch the surface.

Oil and gasoline spills can also cause damage if they’re not attended to immediately. These liquids dissolve the asphalt binders and can leave behind permanent damage if not cleaned up promptly. It is recommended that you use a grease removing detergent that’s safe for asphalt surfaces when cleaning spills.

Other factors that can damage asphalt include water intrusion into the base and freezing-thawing cycles. These problems can lead to the failure of the entire driveway.

To prevent these problems, you should have your asphalt driveway sealed every couple of years. This protects the surface from water penetration and can reduce the number of potholes that may develop. Additionally, it is a good idea to limit the amount of de-icing chemicals that you use. These chemicals can deteriorate the asphalt surface and damage your vehicle’s tires.

Another way to protect your asphalt is by building up the soil near its edges. This allows for proper drainage and grass growth, which will help support the asphalt and minimize cracking.

Taking the time to inspect your asphalt driveway on a monthly basis will help you catch any potential problems before they become major issues. It is also a good idea to inspect it after extreme weather events, such as heavy rain or snowfall. This will help you spot any cracks, potholes or other signs of wear that you might not have noticed otherwise.

If your asphalt driveway is new, you should take care not to drive or walk on it for the first 24 hours after installation. During this time, the surface needs to cure properly. You should also put up barricades or warning tape to keep vehicles and pedestrians off the new asphalt until it dries completely.